Monday, December 21, 2015

Denim and Things

I just want to start this post by stating how much I love this denim shirt!?!?! Seriously, I must wear this denim shirt at least once a week in some shape, form, or fashion. Denim shirts are so versatile and timeless. You can button it up to wear with slacks, wear it open as a jacket, wear it open with the front lapels tied, or wear it around your waist! 

In this post, I chose to wear my denim shirt as a jacket with a simple white v-neck, which is yet another classic piece. I paired these items with black jeans and black pumps. This was the perfect outfit for a lunch date with my mom, but this look could easily be worn for an evening out with friends. 

Enjoy! 


Black Wool Hat: Forever 21 (Find a similar look here) 
Denim Shirt: H & M
White V Neck: Forever 21(Find it here)
Black Jeans: Forever 21 (Find it here)
Black Suede Pumps: BCBG

And yes, I am still rocking my box braids. See why I love box braids as a protective style here.

Until next time...
Be faith-filled, fearless, and fabulous,
Kurly Ken


Tuesday, December 15, 2015

Birthday Behavior

Today is my birthday, and I feel incredibly blessed! I am so grateful for all that God has given me, and I am incredibly excited about what the next year will bring. 

Today's post is a few pictures of my birthday outfit. Lately, I have been very into the black, gray, and white color palette, which goes along with my own minimal vibe. I still like to add a pop of color, which often comes across in my accessories and makeup. 


Black & White Stripe Turtleneck: H & M
Black Trousers: H & M
Black Leather Chain Booties: Aldo


And then I decided to add a hat because I felt like I was missing something! 

Black Beanie: Forever 21


Until next time,
Stay faith-filled, fearless, and fabulous,
Kurly Ken


Tuesday, October 6, 2015

Style Post: Outfit Collaboration with SHEisADollOnABudget

So I decided to do an outfit of the day blog post collaboration with my long time friend and fellow fashion blogger, SHEisaDollOnABudget. On this particular night, we headed out to the Dallas Museum of Arts (DMA) to try something different.


The DMA is open late nights every third Friday of the month and MAN... IT. WAS. PACKED!!! There was a whole lot of art, people, and street vendors! 

Here is what we wore:


If you would like to know the outfit details for my friend, please head over to SHEisADollOnABudget, where you can learn tons about her personal style, gain tons of outfit inspiration, and find links to key style pieces she has been rocking. 


Now my outfits have been pretty minimal these days. 
Outfit details:
Olive Green Muscle Tank-Forever 21
Black Midi Con Stretch Skirt-Forever 21
Wristlet- Coach

Until next time...
Be faith-filled, fearless, and fabulous,
Kurly Ken

Until next time....
Be faith-filled, fearless and fabulous,
Kurly Ken


Saturday, October 3, 2015

Natural Hair: Tips for Hair Growth + Length Retention

So I took my braids out recently, and I was pretty impressed with the growth! I've been taking my hair more seriously nowadays! When I chopped my hair off in April, I cut a significant amount, roughly about two to three inches. Don't get me wrong--- it still had length, but I definitely cut off quite a bit. Five months later, my hair has come back around full throttle, and I am loving the length!  

Here are some my tips for hair growth and length retention:

Moisturize
Water is the best moisturizer your hair can have. Whether you use water alone or water in conjunction with Aloe Vera juice or some other mixture, water is sure to give your hair strands the most optimum levels of moisture it needs. Now, when you follow water with a hair cream and an oil, you not only seal in the wonderful moisture of water but you also increase the likelihood that your hair will stay moisturized longer. You can moisturize your hair by spraying water on your hair once a day or every other day. I typically assess my hair to see what it needs. Some days I spray my hair daily if it needs water and follow up with a cream and oil. Other days, I spray with water only. It truly depends on my hair needs at the moment.

While water sprayed on outside of the hair is important, drinking water for inside replenishment is important for the inside. I have been a beast about drinking water this summer, often drinking 8 to 10 glasses per day! Once upon a time, I had to force myself to drink water, but now, my body does not feel right without it. 

Protective Styles and Low Manipulation Styles
Until recently, I have been wearing several protective styles. In May and most of June, I wore box braids. In the later part of July, I wore Marley Twists. In August and September, I wore box braids. In addition to wearing these protective styles, I continued to wash and moisturize my hair, which only improved the overall health of my hair. Protective styling has been working for me, and I'll be wearing mini-twists or marley twists very soon. Who knows!?!?! Maybe even box braids again (Check out my post on Ten Reasons Why I Love Box Braids) Stay tuned!

Healthy Eating
I am sure you have heard the phrase, "You are what you eat!" This is a phrase I live by. I typically stick to a mainly pollo-pescetarian based diet, but I have been making greater efforts to incorporate more vegetables and fruits in my daily eating. My daily smoothie now consists of 4 cups of fruits and vegetables, and my body has been living for these smoothies. My typical smoothie may include a leafy green like collards, spinach chard, or kale. It also may include tomatoes, avocados, bananas, berries, oranges, apples, flax seed, chia seed, almond butter, ginger, and the list goes on. No smoothie is EVER the same. I typically include whatever fruit and veggie my body is craving. My skin has been more radiant and has a natural glow to it. My nails have to be filed on a weekly basis to keep up with the growth, and I know my hair is getting some of these gains too! Not to mention, I take prenatal vitamins and fish oil, which also encourages hair growth.


Scalp massages 
I really wasn't into scalp massages until I started wearing my protective styles recently. Prior and after washing my hair, I would put a little olive or coconut oil on my hands and massage my scalp. This was super relaxing, and scalp massages have been known to stimulate the blood flow to the scalp, which encourages hair growth. While I do not believe scalp massages alone caused my hair growth, I do believe it promoted a healthy scalp, creating a good environment for hair growth.

Check out my hair growth comparison from April 2015 to September 2015: 

(April 2015)

(September 2015)

Honestly, my hair has been thicker and feels stronger in general. I also love the shape of my hair as it grows out. I have received tons of compliments from random strangers, church peeps, and family. Even my husband could see the difference in the growth! So...going forward, I will continue to incorporate these areas into my regimen and hopefully you can add these areas to your hair regimen too!

Until next time...
Be faith-filled, fearless, and fabulous,
Kurly Ken

Monday, September 21, 2015

Ten Reasons Why I Love Box Braids


So for the past four weeks, I have been living in box braids, and may I just say, I freaking love them.

Here are my Top Ten Reasons Why I Love and Am Living in Box Braids:

Número Uno... I can simply wake up and go. I spend less than a minute or two styling my hair in the morning, which means I can sleep a little longer! Who doesn't want that!?!?!

Número Dos... I have multiple style options! There is never a dull moment when I rock my braids. Whether it's a simple ponytail, complex updo, or just all down, I can always switch my hairstyle with ease. Check out my other blog post for box braid style inspiration:


Número Tres... Braids are a great protective style. I can easily moisturizer my own natural hair with sprays and leave in conditioner to ensure my hair is not being deprived while its tucked away!

Número Cuatro... The hair for box braids is fairly inexpensive. While the installation process may take some time, especially if you are doing a self-installation like me, it will all be worth it.

Número Cinco...My wash day routine is cut in half because I can easily get to my scalp to clean it. I wash my braids once a week and moisturizer my braids just like I would my own hair, but the process moves much faster.


Número Seis... My hubby loves them. Enough said!!!

Número Siete... My hair is growing like a weed!

Número Ocho... Did I mention I can leave them in my hair for 6-8 weeks? Winning all day over here!!!

Número Nueve... You can safely rock hair color when you wear box braids! I stepped outside of my normal 1B/ Off black/brown box and added a little honey blonde just for a little spice.

Número Diez... Box braids fit any setting you're in, whether it's casual, semi-casual, or professional. You can get away with box braids anywhere you go! 

Now, after reading this post, you should want box braids in the near future! Don't be surprised if you see me rocking them again before this year is over! 

Until next time,
Be faith-filled, fearless, and fabulous,
Kurly Ken

Monday, August 31, 2015

Monday Motivation for those who are Stressed and Pressured

This morning after my workout I was going to read one of the excerpts from my typical devotional, Proverbs 31 Women. For some reason, the excerpt was not in my inbox as usual so I reached for my YouVersion Bible App. The verse of the day was Psalms 119:143 (NLT), which says "As the pressures and stresses bear down on me, I find joy in your commands".  


After reading this verse, all I could say was "Wow". If any of you are beginning something new or at the start of a new journey, you understand how pressures and stresses can build up fairly quickly. For me, pressures and stresses come as I complete this fifth and final year of coursework in my doctoral program. For you, it may be the start of a new job and the new pressures to perform. For someone else, it could be the start of a new school year and the stresses to top their results from their previous school year. Perhaps someone has pressures in their household to do and be a better role model for their family. Pressures and stresses are something we can all relate to! 

But this verse right here reminded me to look at these pressures and stresses as an opportunity, rather than a burden!  Instead of thinking, "I have to...", I can  try thinking "I have the opportunity to..." 


  • For example, I might have said "I have to allocate sooooo many hours to working on my dissertation". Instead, I can say " I have the opportunity to have a flexible schedule, where I can set aside time for working on my dissertation." 

  • I might have said "I have to complete all this paperwork for my internship process. Uuugggghhh!" Instead, I can say, " I have the opportunity to have made this far to EVEN be able to apply to internship!" 

I could go on and on with examples, but do you get what I am saying!?!?! Try to look at your stresses/pressures as an opportunity rather than a task. When you are able to look at these things as an opportunity, you are able to see that these pressures/stresses are truly gifts that God entrusted you and only you with. When you look at something as a gift, you should experience joy right!?!?! I'm just saying!!!!!

So I challenge you today and going forward to remind yourself to look at your stresses/pressures as an opportunity, or a gift from God, and find joy in having that opportunity, or that gift, from God!!! 
Besides God has already equipped you with everything you need to conquer the stresses/pressures so go forth and conquer!

Until next time,
Be Faith-filled, fearless, and fabulous,
Kurky Ken

Sunday, August 23, 2015

HAIR UPDATE + GOALS

I wanted to show how my hair was growing since I cut it in April. Check out the post here to see how it looked when I first cut my hair.

Hair Update:
Since "THE" cut, my hair has been growing out thicker than ever. It literally is stacked full of body, which may also be attributed to the layers I cut in my hair. I think the cut helped to give my hair a healthy beginning. Not to mention, I have been protective styling ALOT lately with braids and marley twists. And even when my hair is tucked away, I moisturize, moisturize, moisturize! 

But I am loving the grow out process....


Goals for Both Hair and This Thing Called Life:
So as I enter my fifth and final year of course work, I want to really ensure that I take time to take care of my hair--- as well as myself. Often times, when the school year hits, self-care falls to the weigh side, but not this school year! Nope! I'm devoted to taking better care of myself by doing the following:

1. Prayer and Meditation
2. Journaling in my Prayer Journal 
3. Exercise at least 4 days per week 
4. Eating Healthy (Incorporating more fruits and veggies on a daily basis via smoothies)
5. Taking care of my hair and skin 
6. Spending time regularly with family and friends
7. And the list goes on...

I currently feel like I'm on the right track when it comes to self-care, and I want to stay that way. Last year, I spent a lot of time stressed and depressed trying to jump through doctoral hoops! My self-esteem was waning, and my self-care was at an all time low. But I took a lot of lessons from last year, and one lesson was to maintain self-care, pouring into yourself so you can pour into others. With dissertation, internship applications, and my final year of coursework, I have to execute it! No excuses! Taking care of myself will overflow into other areas of my life like work, school, and relationships, whether directly or indirectly! So to all my readers who are returning back to school, in some shape, form, or fashion (whether student, teacher, or both---like me), have a blessed school year and take care of yourself (and your hair;-)

Until next time...
Be faith-filled, fearless, and fabulous,
Kurly Ken, the doctoral candidate

Friday, August 21, 2015

My natural face regimen that helped my acne...


Skincare
Skin care has always been something that has been priority for me, mainly due to the fact that I suffered with acne for many years. In my adolescent and college years, my skin was plagued by acne, including cystic pimples, blackheads, whiteheads, and terrible hyper pigmentation on my forehead and cheek areas. In addition, I had extremely oily skin, which added an additional element to my acne.

My Personal Story
I spent the majority of my teen and early adulthood trying to find a solution for my acne. When I tell you I tried everything, honey----I literally tried everything! Proactive, Clean and Clear, Neutrogena, St. Ives, Mary Kay, and the list goes on of products I experimented with. These products may have worked initially but did not keep my skin clear consistently. I still struggled with cystic acne and hyper pigmentation, primarily on my forehead.


I continued to struggle, and some of my family members took notice of the issue. My sister took me to purchase my first professional line of makeup, which was Fashion Fair. Makeup was only a temporary solution, often making my skin worse by creating an oil slick face as a breeding ground for cystic pimples. In my senior year of high school, my mother took me to dermatologist. While my skin cleared up quite a bit, this process was very costly (shout out to my mom for a sacrifice though), and eventually, the medication and upkeep of dermatologist appointments was too much.

 (High school...don't judge a sista)

When I headed off to college, my skin reverted to its old acne ways of fine bumps and excessive hyper pigmentation, which is what the picture depicts below. Now, some may look at these pictures and say, "Your face doesn't look that bad!" But, those that grew up with me saw my struggle. Honestly, I got rid of a lot of the pictures when I was younger due to how horrible my skin looked; I couldn't bare to look at my acne. These is are the few pieces of evidence that still remains. 

(college years)

In my adult years, I still struggled with acne and would worsen at the sign of any stress. It wasn't until my mid twenties that I stumbled across information regarding natural remedies for curing acne. Youtube, forums, and blogs on natural ways to treat and reduce acne totally changed my life. I would literally wake up in the morning and research all day. I came up with a routine that reduced my skin issues significantly. So I will discuss the products I use and I will explain their benefits to the skin.

My All Natural Face Regimen
Morning:

1. I love the oil cleansing method. Although I use a modified version of the oil cleansing method, I have seen so many benefits, which include a reduction in the oil production of my skin, fading of my acne scars, and an overall glow. In the morning, I oil cleanse by washing my face with coconut oil and warm water. I literally rub coconut oil all over my face in circular upward motions. Then I take warm water and massage it into my skin! This feels like absolute heaven!!!! After that, I wipe my eyes off with a white towel and allow the rest of my face to drip.
2. I take a cotton square and  tone using Thayer's Lavender Witch Hazel with Aloe Vera.
3. I moisturize my face with Aloe Vera gel and an oil mixture (jojoba oil, almond oil, tea tree oil, and grapeseed oil).
4. I apply my makeup!

Night: 
**My night time routine is pretty much just like my morning routine with the exception of 1 step. **
1. I wash my face daily with African Black Soap. I've been using black soap for five years and this was one of the first things I used to help my skin. I still use black soap now to ensure the removal of all of make up and dirt from the day.
2. I oil cleanse using coconut oil just like my morning routine.
3. I tone with Thayer's Lavender Witch Hazel with Aloe Vera.
4. I moisturize with Aloe Vera gel and my oil mixture.

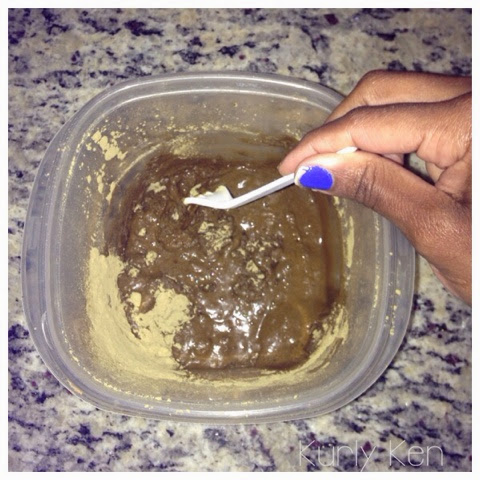
Twice a week I exfoliate with a water and baking soda paste. I have even created and applied a coconut oil and baking soda paste to my damp face as an exfoliant. Both mixtures work well for me, but I will say that the coconut/baking soda mixture leaves my skin both exfoliated and glowing. Now, two to three times per week, I wash my face with raw, unfiltered honey. The honey face wash is AMAZINGGGGG! My skin glows, and I feel like a bronze goddess afterwards. Check out Heyfranhey's video on the honey facial:


So what's so good about this regimen!?! Child, let me tell ya-----Everything! There is nothing better than being able to use products in their purest, all natural form!!! My natural based face regimen has been THE saving grace for THIS FACE! So let me break down what these products can do for your face.
  • Coconut Oil: It's a antimicrobial agent, rich in vitamin E. It allows for proper functioning of the sebum glands and clears blockage, which is super beneficial for my oil skin. No oil on oil crime here! Oil actually brings balance to my skin!!! It's also an anti-inflammatory, reducing inflammation from acne. 
  • Thayer's Lavender Witch Hazel with Aloe Vera: This is 100% witch hazel that acts a a gentle, soothing toner. No alcohol at all! Lavender is antibacterial and anti-inflammatory. It can help reduce swelling, redness, and irritation. 
  • Aloe Vera Gel: It helps as an antibacterial, anti-inflammatory, scar reducing, and cell growth stimulator. 
  • Jojoba Oil: This oil mimics the sebum on your skin, and moisturizes the skins without clogging pores. It also reduces the appearance of pores, wrinkles, and stretch marks.
  • Tea Tree Oil: It's antibacterial properties help with oil regulation  and decrease the severity of breakouts. 
  • Sweet Almond Oil: This oil can help reduce dark circles, spots, wrinkles, and fine lines. 
  • Grapeseed Oil: It's antioxidant and anti-inflammatory properties treat and prevent breakouts. 
  • African Black Soap: In it's purest form, black soap typically consist of cocoa pod, roasted plantain skins, palm kernel oil, coconut oil, palm oil, and natural sodium, Some recipes include cocoa butter, shea butter, lavender oil, and other oils. This soap can help your skin "purge" impurities. Sometimes it seems like your skin is getting worse before it get's better, but if you are patient, it help remove those impurities and prevent bacterial growth, decreasing acne. It can also be used for eczema and other skin ailments as well.  
  • Baking Soda: Used with a substantial amount of liquid, baking soda can act as a powerful exfoliant. Be sure to use water or some other liquid like substance when working with baking soda. It's abrasive properties can scratch your skin and cause micro-cuts. 
  • Honey: This ultra moisturizer/ humectant can help skin retain moisture and elasticity. Antibacterial and antifungal properties help decrease the appearances of scares and increase healing and tissue regeneration.
I cannnnnnnnnot tell you the difference these products have made in my skin. My skin has come a long, long, long way. Now, I follow this skin care regimen in conjunction with drinking 8-10 glasses of water and eating a well rounded pollo-pescetarian diet (about 85-90% of the time). So if you are struggling with acne of any form, try out a few of these natural based products or at least do some research to consider what all natural products may work best for your skin.

Please leave a comment below if you have any natural products or a routine that works for reducing acne or any skin related issues... 

Until next time...
Be faith-filled, fearless, and fabulous,
Kurly Ken

Monday, July 20, 2015

Motivation Monday: How to Live Your Best Life Now

Recently, I've been reading How to Live Your Best Life Now by Joel Osteen. To be honest, I haven't read for enjoyment in a such a long time. I truly haven't had made time for it between married life, school, teaching, and so on. But on one particular day, I was being a typical little sister by rummaging through my big sister's books. I came across several books. I quickly narrowed my selections down, and I chose two books with one of the books being How to Live Your Best Life Now.


I actually took this book with me to Hawaii! I figured I could read it on the plane, but once I started reading it, I honestly couldn't put it down. I found myself identifying with a number of areas being discussed in the book. Exactly two weeks later, I only have 3 chapters left out of the 32, and I honestly feel like this book has given me a fresh perspective on my spirituality and daily walk with God. Within the book, they discuss several main areas, which include the following:

1. Enlarge Your Vision
2. Develop a Healthy Self-Image
3. Discover the Power of Your Thoughts and Words
4. Let Go of the Past
5. Find Strength through Adversity 
6. Live to Give
7. Choose to be Happy

Each of these areas covered things that I have honestly heard at some point and time in my life; some of the areas could easily be termed as "common sense". But honestly, I needed to be reminded of the importance of some of these areas. I also enjoyed how this book highlighted various scriptures that coincided with these areas as well, which really reignited my fire for The Word and intentionally seeking God throughout my daily walk. Now, I find myself searching through the scriptures to deal with everyday issues and concerns as well as just talking to God throughout the day (whether it be a prayer of gratitude or fix it Jesus).

One of my main takeaways from this book was God desires for you to live your best life regardless of any past hurts or afflictions. Therefore, letting go of negative mindsets, enlarging your vision, giving, and enjoying life are essential for prosperity as a Christian (Ephesians 2:7). Ultimately, God wants you to shine so that others can see Him through you. Your life should be a testimony of some of His best works. When we really let go and trust God, He can do things in our lives beyond what we can even conceive. 


Anyways, I can talk all day about this. I just wanted to pass along my excitement for this "new read" of mine and daily walk with God on living my best life now. If you have read this book, please share your thoughts or testimonies. If you are excited and desire to read it, please share that enthusiasm as well. 

Until next time...
Be faith-filled, fearless, and fabulous,
Kurly Ken

Wednesday, July 15, 2015

My Secrets Revealed: My Homemade Moisturizing Cream

Hey Kurlies,

I am finally dishing the goods on my homemade moisturizing cream/mixture. It's super simple. For the most part, I use the same oils and definitely the same cream. I may supplement one or two oils depending on my hair needs, but in the end, my natural hair is moisturized. 

 My recipe includes the following ingredients:

OKAY African Shea Butter

Crisco Extra Virgin Olive Oil
Louana Coconut Oil
Sunny Isle Jojoba Oil
De La Creme Sweet Almond Oil

Now, when I combine these ingredients, I never use exact measurements. I "eyeball" it everytime.


1. First, I start with the shea butter, and I use a substantial amount of this. 

2. Add the olive oil. This is about a teaspoon amount. 


3. Add the coconut oil. I add a large amount of this. The amount of coconut oil is typically more than the Shea butter. Coconut oil has been working really well on my hair as of late so I always include it in this mixture.

4. Jojoba is added next. I literally add a quarter size of this.


5. The last thing I add is the sweet almond oil. I typically add a table spoon of this. I love the way this oil smells. Pure sweetness.


I whip up all the ingredients and let it sit for about 30 minutes. Then...Ta-da! I have my mixture. On this day, I placed my hair in large twists and pinned them up. I'll keep these twists in for the week.


My hair is moisturized and protected. This will also cut down my time preparing for school and practicum this week. At night, I'll spray my hair with the aloe/ water mix and then I'll apply my homemade cream to my twists as needed. Simple and easy!! My hubby loves this hairstyle on me, and I get a ton of compliments from others when I wear this style as well. Perfection!

If you have any questions or comments regarding my concoction, please comment below.

Kurlies weigh in: Do you have a DIY mixture you use on your hair? If so, feel free to share. If not, are you thinking about creating one? What would you include in this mixture? 

Until next time...
Be faith-filled, fearless, and fabulous,
Kurly Ken

Friday, June 12, 2015

How To Achieve that Bronze, Sunkissed Glow for Brown Skin


Summer time is here, and I have been searching for ways to get that perfect bronze glow. However, finding products for brown skin girls, such as myself, has not been easy. I wanted a naturally sun kissed look for the summer months so I did a little research.


Below are some of my top product recommendations to achieve this look, and most products are budget friendly.

(left to right: MAC Mineralize Skinfinish, ELF Sunkissed Glow Bronzer, Nyx Blush, Mary Kay Lipsticks)

Top Products:

MAC Mineralize Skinfinish in Dark Deep


If you have not heard of this product, you have officially been under a rock! This is one of my holiest of grails! This product provides an all over natural glow. While it retails as a high end product, the product formulation and the color pay off suit my skin perfectly. Also, my skin is super prone to breakouts so when I find a product that doesn't break me out, honey, I stick to it like glue!

Elf (Eyes Lips Face) Sunkissed Glow Bronzer in a Warm Tan 


This bronzer is most certainly a bargain product. Initially, when I picked it up, I had no idea how I would use, but for $2, I couldn't leave it there. But now, I literally use this products as a highlight on the bridge of my nose, Cupid's bow of my lip, tear ducts of my eye, and as an illuminator on my cheeks! I seriously love this product and just a little goes a long way in providing the perfect shimmer you need. 

NYX Blush in Terra Cotta 


This is a product that has been in my makeup kit for a while, and I suddenly found use for it. I use it as a blush to warm up my cheeks. It is the perfect way to provide subtle warmth. 

Lipsticks

The next two lipsticks are used in conjunction with each other. When I want a nude lip with a little shimmer, these two lipsticks certainly do it for me:

-Mary Kay Lipstick in Shell
-Mary Kay Lipstick in Amber Glow 


As a brown girl, it hasn't been easy finding an affordable (key word here!!!) nude lipstick, but these lipsticks provide that sultry, barely there lip color I want to achieve that compliments this brown skin of mine. Not to mention, these two lipsticks are super moisturizing! 


(All products mentioned above were used to achieve this look)


What are some of your favorite make up products that help you achieve that summer glow? 


 #randommomentsofken

And on another random note.... I have some different ideas for my upcoming blog posts that cover my other areas of interest like healthy eating, exercise, minimalism, spirituality, and yada-yada-yada. But don't worry! I still have plans to do some upcoming posts on hair, makeup, and style. I just wanted to mix it up a little. Stay tuned lovelies!

AND LASTLY, HELLO TO MY NEW SUBBIES! GLAD TO HAVE YOU HERE!!!

Until next time...
Be faith-filled, fearless, and fabulous,
Kurly Ken 

Tuesday, May 19, 2015

Baby, I am back!!!!!

Hey Kurl Fam!!!!!!! 

So I've been slacking on my blogging game!!!! I know! I know! But I had some major doctoral hurdles I needed to overcome this semester.

One of the biggest hurdles was passing clinical skills, which I did!!!!  We need to cue the fireworks because this is a BIG DEAL on the doctoral journey! I am so grateful!


I was also working on my first journal publication with my research partner, and I am overjoyed to say that our article got accepted into a national academic journal. Whoop! Whoop! 


There were also some professional goals that I was working towards but I'm not quite ready to share those yet. Those things are still in the making. 

While all these wonderful things occurred in school, I decided I wanted a change sooooooooo I cut my hair in April of this year. Yes! Yes! 


So a lot of great things were happening professionally and educationally, and to be honest, I was sooooo burnt out from school that I had no juice left in me to blog.....but I'm back baby! Thank you to those who hung in there with me and a "Kurly Ken" welcome to my new subscribers!

Until next time,
Be faith-filled, fearless, and fabulous,
Kurly Ken

Monday, February 23, 2015

How to Henna your Hair

The Benefits of Henna

Today's post is dedicated to the henna process. Henna has some wonderful benefits, and these include:

  • Shiny, more manageable hair
  • Less breakage and splitting ends
  • Smoother texture
  • A slight reddish/ brown hair tint (depending on your natural hair color) in the sun and other lit areas
My Henna Process

Now, I have been applying henna to my hair for the past three years. I typically henna my hair once every three months. In this post, I show you the steps I take to prepare my henna, the process of how I henna my hair, and my post-henna treatments.

The morning of...
I prep my henna mixture. I use the following products/ingredients start with :

Jamila Henna, can be purchased online or at your local indian grocery store

8 drops of Real Lemon 100% Lemon Juice

3/4 cups of water

Steps to Create Mixture:

1. I start by pouring the Jamila Henna in a plastic tupperware bowl (specifically used for henna and henna only).


2. I add 8 drops of lemon juice to the henna. Lemon juice has lightening agents for hair. In the past, I have added honey to provide additional moisture. Additionally, I have also added conditioner to my henna to create a henna gloss. I received this idea from Henna for Natural Hair. There are multiple ways to mix henna and this article provides a great overview.


3. I add 3/4 cups of water to the henna and lemon juice.


4. Then I use a plastic utensil and begin to stir the products/ingredients together. 


Initially, the mixture is watery, but as stirring continues, the mixture will thicken, which is normal. 


5. Once the mixture thickens and no lumps in the mixture are detected, it should look like this.


6. I cover my mixture with a lid. 


7. I then take the henna mixture and place by the window so the heat can allow the dyes in the henna to release. The henna mixture sat by the window for 9 hours (while I was at work). 

Once I shampooed my hair using Naturally Athena Goddess Clay Cleanse, I untwisted each section of hair, applying the henna to each section.


This is how my hair looked once the henna was applied. 


I covered my hair with a plastic bag for three hours. After three hours, I rinsed with warm water. Then I conditioned my hair for 30 minutes with Naturally Athena Goddess Conditioner. It's important to condition your hair after you complete the henna process. Henna almost reminds me of a protein treatment, strengthening the hair strands. Like a protein treatment, it can also cause your hair to be a little dry. Therefore, conditioning the hair is a must after a henna application. Following my conditioner application, I then moisturized my hair with Naturally Athena Goddess Curl Creme to prepare my hair for box braids. 

24 hours of braiding later...

Until next time,
Be faith-filled, fearless, and fabulous,
Kurly Ken